12.27.2011

Announcing: Going Bitless online class info


Yes you too could own this sexy Zebra bitless
bridle for your horse!
The Next Going Bitless online class will start January 1st running through January 30th with the first videos to be released for personal practice followed by a Skype Q&A session a week. This class is suitable for beginner (horses and riders) as well as the addition of intermediate exercises in this class for those who have done the class or are further ahead. It is suitable for all disciplines as well.
You will have the week to get signed up and review and practice the first exercises. Additional video exercises will be sent out each week with call recordings for the people who could not attend or to review info. The Skype Q&A answer session will be held Mondays at 7pm EST. If you have not downloaded Skype click here to get it. Otherwise, if you cannot make the calls or can't get Skype, You may post questions to the Blog or Email them through my Website. If you have a Youtube channel, you can send me links to your uploaded videos from your channel for evaluation. If you have another video host you use, that is fine too. I only need to be able to view them through the links to share with me for evaluation. If you need more help with this or have more questions contact me. The cost of the online clinic will be of $150.00 payable through my site (click here to sign up and pay). If you would prefer to audit the class it is $100.00. This offers you access to all videos exercises and Skype call replays as well as email in questions to be answered on the calls.
To Purchase my Side Pull Bitless bridle click here.

Here is how the class will work:
1. Sign up by paying through Paypal. (click here to sign up and pay)
2. Add me through your Skype contacts search Farah.Dejohnette or Farah DeJohnette Horsemanship
3. Once you have signed up and I have your email, You will receive the links to the weeks video lessons.
4. Speak to me on the weekly Skype call to have questions answered and get feedback on videos.
5. Post questions on the blog or email them to me here if you don't or can't access Skype.

http://fdhorsetraining.com/
Subscribe to my Blog

11.26.2011

Liberty-Line-Mounted exercise: Turn on the Forehand


Here is another exercise that will easily flow applying my Liberty-Line-Mounted progression.

Turn on the Forehand (or Yield the hindquarters) is a movement that has a variety of applications. 
It is a Suppling exercise, A strengthening exercise, a way to learn how to request the hind legs of the horse one at a time. It is also a very basic way to present the idea of moving sideways as opposed to forward (off of a "Touch Cue") or what is otherwise known a a Leg Yield. 

As always, Introducing a Language, Concept or Exercise at Liberty is always a great way to improve your Connection, Body language, trust, and learn how to read your horses responses and natural ability, fitness and strength level. I prefer to see a horse try a movement when he is unencumbered with tack or a rider to see what his true level, natural movement and flexibility is. Then I can go on to the Line or In-Hand work departing from this place and not push the horse beyond his comfort level. After that, on to Mounted if it is appropriate.

A Turn on the Forehand is when a horse keeps his front feet in one spot and cross steps his hind legs around  in a circle 90, 180, or 360 degrees. 

There are two ways approach this at Liberty. The first is simply to use Eye Contact to draw to horse around 360 degrees on the spot he stands. If you have worked on your horse keeping his eye on you when you move this will be easy. You would start by standing directly in front of your horse and going to the left or right in a circle around his body working toward his tail a safe distance away. You make a circle around your horse slowly. Clucking sometimes helps if they wont look or moving them a step or two and starting again. Done correctly, the horse will pivot on the spot crossing his hind legs creating a Turn on the Forehand in his effort to keep his Eye(s) on you. 

If your horse has not learned to yet keep an eye on you, then another way to do this at Liberty is to stand close to your horse while he is free and place your hand on bridge of his nose. For example, If you were on your horses left, you would take your Left hand on their nose and step around toward their hip. You can then add a touch of the hip or flank (you may not even need to). I actually like to touch where my leg will go with my hand to make an "Association exercise" The horse will learn to associate that touch where the leg will go later with my leg when I am mounted. 

Once you and your horse have a good understanding of this at Liberty, you can put your bridle or halter on and go through the same sequence with a feel on and off the rein or line. If my horse is on a line, I can apply the Eye Contact exercise again while keeping a long slack in the line so the horse can move on the pivot freely. 

If I want to use a hand on the rein (which would be similar to hand on the bridge of the nose), I would stand in that same position on the left side of the horse with my left hand on the left rein instead of the nose and touch where my leg would go or the hip/flank (if necessary and add a cluck). Remember to release the signal as soon as the horse tries or responds. Go to the other side when ready and remember one side is always a little more difficult than the other and this is a good way to see that and help your horse become more strong and flexible in a gentle way. 

If you are doing so well with this you feel ready to do it mounted, go ahead and give it a try. At this point your horse will feel confident in the exercise and will understand your Ground Touch and the feel of a rein or Line. Once you are on and ready to try it. Touch you horses side a little further then behind the cinch or girth with you leg and cluck if necessary. (you can also turn your body in the direction left if you are using left leg or vice versa) One step over is plenty to reward and build up from there. 

Remember to go slow and go back to easier levels if it is getting too difficult. Have fun and patience!

http://fdtvirtualclinic.blogspot.com/ Subscribe to my blog here!


11.11.2011

FDTH Online Bitless video class update


I am really pleased with how this first class is going! Here is a sample of the Intro to Going Bitless online Virtual Clinic class on starting or transitioning to Bitless riding. I will be offering this class again as well as an Intermediate, and Advanced class. I will keep you posted on this. This video will be available for sale soon if you just want to work at your own leisure and pace. 
http://fdhorsetraining.com/
Subscribe to my Blog


10.26.2011

Announcing: Going Bitless class info

The Introduction to Going Bitless online class will start November 1st running through November 28th with the first videos to be released for personal practice followed by a Skype Q&A session a week. You will have the week to get signed up and review and practice the first exercises. The Skype Q&A answer session will be held at a time to be determined. Sunday or Monday AM or PM times are available by popular choice so let me know in the comments section what time of those two days may work best. If you have not downloaded Skype click here to get it. Otherwise, if you cannot make the calls or can't get Skype, You may post questions to the Blog or Email them through my Website. If you have a Youtube channel, you can send me links to your uploaded videos from your channel for evaluation. If you have another video host you use, that is fine too. I only need to be able to view them through the links to share with me for evaluation. If you need more help with this or have more questions contact me. The cost of the online clinic will be an Introductory rate of $150.00 payable through my site (click here to sign up and pay). To Purchase my Side Pull Bitless bridle click here.

Here is how the class will work:
1. Sign up by paying through Paypal. (click here to sign up and pay)
2. Add me through your Skype contacts search Farah.Dejohnette or Farah DeJohnette Horsemanship
3. Once you have signed up and I have your email, You will receive the links to the weeks video lessons.
4. Speak to me on the weekly Skype call to have questions answered and get feedback on videos.
5. Post questions on the blog or email them to me here if you don't or can't access Skype.

http://fdhorsetraining.com/
Subscribe to my Blog


9.30.2011

New! Upcoming class: Going Bitless

I'm too sexy in my Zebra Bitless Bridle!
After getting an inspired thought from a fellow horse lover, I am offering an online Bitless Bridle Class in the next few weeks. This class will introduce exercises and concepts for not just starting and transitioning to a Bitless Bridle but also improving your communication with any equipment. A good prerequisite would be Carolyn Resnick's Waterhole Rituals but it is not a necessity. It would also be beneficial if you have purchased one of my Buckaroo Bitless Side pulls. This is what I will be using in the classes for the feel I prefer. If you have one you and your horse already like, by all means keep using it. The lessons will apply to all types and configurations of Bitless bridles. I do most of my training, ground and mounted bitless, if not with my Liberty Rein used in conjunction.

Going Bitless is a personal choice and should be made because it feels right for you and your horse. I often train horses that go in bits in competition, Bitless until we have to compete. It is a nice way to keep the horses light and responsive in the bridle. I have found horses that will not accept a bit due to mouth issues or facial pain that a Bitless bridle is suitable for. Some horses just plain can't or wont accept a bit. Bitless is often the best option for these horses.

It is my personal belief that most if not all horses can go Bitless with time, patience and proper training as well as any discipline of horse. English or Western. I also believe that higher and advanced levels of riding can be done with a bitless bridle.

There are many Bitless options out there. I chose to work with Buckaroo Leather on a customized version on their existing Side Pull design after seeing the already nice line of Side Pulls they had. I had something in mind for many years and Buckaroo was able to help that design come to fruition (who else could make me Leopard and Zebra Bridles :D!). I never could find a bitless bridle that gave me a feel and communication that my horses and I both liked until now. Buckaroo offers many fun styles with bling and silver too so there is a style for everyone! Not many other Bitless bridles come in as many style options.

As for particulars of the class, I would like to offer this on Skype with video instruction if this is agreeable to most people. Skype is free and has a video option which you don't have to use if you don't want to but is nice for more live face to face interaction. If you don't have Skype it is simple and free to get and use for anyone anywhere in the world. Get Skype here I will update with more details on this upcoming class after I get back from the UK Clinics! Look for more announcements and details after October 17th. In the mean time here is my Bitless Bridle video Playlist to tide you over! : )
http://www.youtube.com/user/FDHorsetraining#grid/user/0A3C2341E9EBA6FB

Here is a link to a past post I wrote on Bitless riding for those interested.
http://fdhorsetraining.blogspot.com/2010/08/bitless-why-i-do-it.html

http://fdhorsetraining.com/
Subscribe to my Blog!

9.16.2011

Half circle pattern

Here is a nice pattern to work on balance, bend and transitions with your horse. Your circle can be from 15-20 meters (45-60ish ft). At each half (use the same spot each time to do the transitions, cones or dressage letters are helpful) you are going to do a transition. A transition can be a halt to walk, walk to trot, trot to canter, to halt, to trot etc. or any combination there of. Your goal is to change in the same spots each time and keep your horses' body on and as close to the shape of the circle. You are also trying to keep your circle as consistent is shape and size as possible. This is good for Energetic and low energy horses alike. If your horse goes way off the circle, leg yield him back to it or if he can't do that yet, guide him back to the circle until he understands the pattern. A nice progression to start with is energetic walk-halt-walk until it's easy. Then trot to walk to trot until easy and so on. If you have a very energetic horse you can use quarter circle transitions. Move on to canter when you feel the others a easy. More advanced riders can do lengthen stride to collected stride or trot or canters to halt. Have fun and let me know how it goes!
http://fdhorsetraining.com/
Subscribe to my blog!

9.01.2011

Pole stride length exercise

This weeks exercise is for learning how to feel your horses' stride length at the walk, trot and eventually canter.

You can do this at Liberty, in hand, and mounted. First you will set up two poles on a straight line 20, 30, or 40 feet apart. Establish a good walk rhythm and then walk over both the poles three times and count how many strides are BETWEEN the two poles. Start counting the number of steps ONLY after you are completely over the first pole and STOP counting BEFORE you go over the second pole. This is important and takes practice.

You want to count 3 times because you want to get an average number of strides for your working gait. Once you have established that number you can set about lengthening your horses stride around the arena by asking with your legs and allowing the energy you create to come through your hips. Get what you think is a longer stride before you go through the poles and then go through them and count the same way as you did before. What you will find is, the number of stride will go down as the stride lengthens. For example if your working walk gave you ten strides in between the poles on average, when you successfully lengthen the stride, It would go down to 9 or possibly 8. The same would go for collecting or shortening the strides between the poles but the opposite. The number will go up ie. 11-12 strides because you can fit more in between the poles.

The role of the poles is to give you instant feedback about the whether the stride actually changed or not. If you keep getting the same number of strides make a bigger change as you go around your ring and experiment. Don't worry if your horse breaks gait. You may be at their maximum ability for now. Try to get the longer stride 3 times in a row, but if it is too difficult, work up to it. It will get better with practice. At Liberty, you can practice this in Companion movement. On line, you can walk or trot with your horse next to you. Once you have it at the walk, try it at the trot and when it is easy try it at the canter. Try to get it smooth and rhythmic as possible by the end. Don't worry if it's a bit inconsistent at first. Practice and repetitions will help you and your horse get comfortable with the exercise. Let me know how it goes in the comment section!

8.18.2011

How to introduce Lateral movement and why


Some of you may be saying "Lateral what?" and some of you will recognize this Horsemanship vocabulary word. Lateral Movement is simply sideways or sideways and forward movement combined ie. Leg yielding, Turn on the Forehand, Side or Full pass, Turn on the Haunches, Shoulder in and Half pass are all examples of Lateral movement.

Lateral exercises embody and resemble Yoga for horses done correctly and with attention to what is appropriate to the horses level, fitness and ability.
Performed correctly, Lateral movements improve symetrical hind end strength, balance, flexibility, and bending. They are a cornerstone of many more advanced maneuvers.

I introduce it at Liberty first in Eye Contact exercises where there is no actual contact with the horse. The horse, by merely keeping his eye on me will perform a simple Turn on the Forehand. I refine it from there up.  That's the first exercise you can play with if you have good Eye Contact from you horse. This can also be turned into Liberty Roll Backs for you western riders or if you just want to have fun and try different things with your horse. Remember a Roll Back is also a Turn on the Haunches sped up a bit. Reining maneuvers are rooted quite firmly in Dressage fundamentals and are merely performed at higher speeds. There really isn't a Discipline that doesn't utilize Dressage Principles in some way shape or form.

If you want to Introduce Lateral work in hand (Bridle or halter). Follow these steps. As a rule I teach everything on the ground first, Liberty first if possible then In Hand. To introduce the concept (and it is a hard concept for a horse) we are going to differentiate the difference between what one leg and two legs means. On the ground this can be applied in a non touch or direct touch method. I am going to deal with how I introduce the Leg cue and the movement to the horse.

I will stand on the side of my horse with either my hand on the bridge of the nose or on my line or reins. I will touch my horses side with my hand where my leg would go with the feel I would like him to respond to. I will then Cluck. One of a few things will happen. The horse may go forward which you will halt and then ask again. The horse may go backwards which you will wait through until you horse offers even the slightest sideways step and then release. You will always release on a tiny effort to the right idea. The horse may not move at all which is actually and impulsion problem. Ask them to step forward one step and then ask again releasing as soon as they "think" the right thought. One other response is that the horse pushes toward you. Just quietly resist until the horse offers to move the other way and praise them and release. Be generous with verbal praise and scratches. You can build up to bigger movements and more steps from there. Be the boss you'd want to show up to work for. Let me know how it goes in the comments section or if you have any questions.
http://fdhorsetraining.com/
Subscribe to my Blog!


8.06.2011

Position Exercises: Mirroring in the saddle Part 2

The Second part of this Position Mirroring exercise is to ride straight lines. You can go down a long side of your arena, the quarter lines, or the center lines. You can also do this in a reasonably flat field. The Quarter and center lines are good because they are open on both sides and it's easier to feel if you and your horse drift a bit as well as  become aware of yours and your horses' Shoulder and Hips. First just ride straight and notice things. The drifts left and right. Is it more one way then the other? Don't try to fix just gather information. Ride the lines about 3 times. The next three times I want you to become aware of your hips and shoulders and them staying absolutely parallel the whole way down the line. What did you discover? What did your horse tell you? Keep playing with it and you can progress to trot and canter as you feel comfortable at each gait. If you have tried this exercise, I'd love to hear from you!
http://fdhorsetraining.com/
Subscribe to my Blog

7.27.2011

Position exercise: Mirroring in the saddle part 1

Have you ever asked your horse to give you riding and position lessons? Well they're the greatest teachers so why not? Here's how you can do it.

First at a stand still with your reins in hand, and your hips and body balanced and tall (tall from lifting your core) on the center of your horse. Develop a muscle memory for what your middle balance is. You can always stop and go back there if you lose it. Practice turning extremely to the right and left without losing you center of balance and holding the reins with a somewhat slack feel. While you are doing this notice what your horse does and make a note. Once you've done this at the halt, I want you to start walking and do the same thing at the walk and notice what your horse does again. Remember to keep you balance equal and in the middle, lifting from you core while turning extremely to the right and left alternating. Do it slow and pause in the center position straight before switching to the other side. Notice if when you turn to each side you keep your hips equal and you keep you balance in the middle. What does you horse do when you take these positions? The answer to this exercise is in listening to what your horse tells you while you do this without judgement. Let me know what you discover in the comments section.
http://fdhorsetraining.com/
Subscribe to my Blog

7.14.2011

The Final Element of the Training Scale: Collection


The last element of the Training Scale is Collection. So in theory if all your ducks are in a row, Rhythm, Suppleness, Contact, Impulsion, Straightness, then collection can be achieved. 
Lets clarify Collection first. I believe there is some confusion in the term for some people. Connection, Balance and Collection are often mixed up.

First of all, Connection (in the physical sense)  is when the horses hind end is Connected to the front end. Or United. Some people say a horse in Disunited when this is not happening. The horse has the appearance of the hind end trailing behind. The first four elements of the Training Scale foster connection. Some people think this feels like or call this Collection.

Balance is when Connection is present and the horse is NOT on the forehand. This also feels like collection to some because is is pleasant, rhythmic, and comfortable feeling to the rider. The gaits feel consistent, the horse feels light in the reins or self carrying, and in feels easy to sit.

Collection is when the frame of the horse is actually elevated and compressed liked an accordion being pushed in. The actual ground covered each stride is less though the energy in the gait (impulsion) is not diminished. This is a common mistake to let the energy diminish. In fact the energy is what creates the collection. What you do with the energy tells the horse whether he should cover more ground or less (collect).

If you and your horse are working well in the other areas of the Training Scale you can add some natural collecting patterns. An easy one is a diminishing circle from 20 meters down to 15 or 10 depending on how capable your horse is at maintaining his Impulsion on the smaller circles. Once you are on the small circle, leg yield out to the 20 meters and then repeat diminishing and enlarging until it gets fairly consistent and relaxed. So here again is way to use the Scale to problem solve and progress. This pattern can easily be introduced at Liberty and on line to get comfortable with before trying mounted. If you start your Diminishing circle and monitor the Rhythm, Suppleness, Contact, Impulsion, and Straightness, you will notice your horse will tell you when he can no longer maintain any one of these elements and it is up to you to listen and adjust until he can get to 15 or 10 meters without drastically losing anyone element. This is much easier said then done and is the very essence of Dressage at all levels. Also remember Dressage is Yoga and Pilates for your horse so it should always be done with and eye for what they are capable of at the time and gradually increased in difficulty when appropriate. Your Comments and feedback are always welcome!
http://fdhorsetraining.com/
Subscribe to my Blog

6.29.2011

Training Scale: Straightness

Straightness comes after Impulsion in the Training Scale and refers to Straightness in the body of the horse and not just going on a Straight line.

Straightness is confusing sometimes because it is about geometry and how the horses' geometry matches the shape you are riding. For example, If you are riding an actual straight line, the horse is literally straight from nose to tail. He is not looking left or right, and his shoulders and hips are parallel. This gets tricky when we want the same thing on a curve, circle or corner. Often on curves, horses shoulders or hips will be to the side of the shape you are riding. Try riding some straight lines and circles and see if you can notice this. A lot of riding is first learning how to feel and notice things and the figuring out how to visualize and ride the right thing.

If you have worked well in the Previous Training Scale elements, You should have a substantially straighter moving horse. Not perfect, but better. Remember as we add elements we continually dance back and forth with all of them until we can get them fairly consistent. There are lots of straightening exercises but as always I like to keep them simple and straight forward (no pun intended!). Riding pefectly straight lines is a great way to practice straightness and then graduate to curves which I think is harder. Best to get a feel for it on the straight line first.

Once you've found a spot to practice straight lines, pick a visual point to focus on like a dressage letter, cone, fence post, tree, husband, friend, etc. Start by riding toward it and just notice how straight or wiggly your horse feels. Keep riding the same line and gradually become aware of the your own body becoming straighter. Your shoulders stay parallel, and your hips stay parallel. Notice some more passes on the lines. What are you observing? As you improve your straightness, add some halts as this is a good way to learn square halts and practice stopping and starting straight on the same line. Here is a video of the exercise with a clip. Let me know how it goes in the comment section : ).
See clip at link below:
http://fdhorsetraining.com/Dressage.html
http://fdhorsetraining.com
subscribe to my Blog!

6.16.2011

Next on the Training Scale is...Impulsion


Impulsion is after Contact in the Training Scale. It is suggesting that the best time to add Impulsion is when the first three Rhythm (Relaxation), Suppleness, Contact are fairly consistent. That said this is merely a guideline and there are times when you need to be outside the box with certain horses. It is always best to listen to your horse when applying any principle or idea to your program.

There are some horses that are so backed up in there energy and movement that forward, high energy exercises may be prioritized before other areas. I find Liberty work especially helpful with these types. It builds the bond and Connection while simultaneously working on the technical aspects of the Training Scale and Natural Impulsion. I find this preferable to using a lot of artificial aids and force which can have the reverse effect of shutting a horse down and sending them introverted. And worse breaking the horses' desire and enjoyment of the interaction of riding.

Impulsion and being in front of the leg also go hand in hand. I want to put my leg on and feel a surge of energy no matter what. I have to feel a change in energy on some kind. If there is a problem here I will work within the Scale on the ground and mounted to help the horse and I overcome it together.

True Connection (the physical kind), Straightness, Roundness, and Collection, cannot be achieved with out a good gas pedal and the understanding of how to balance the energy coming from behind so we are not just pushing the horse faster and faster and more on the forehand. A feel for the horses natural fitness is important also as you can ask for more than they are truly capable of and wind up creating other problems here instead of getting more quality. The photos show two horses moving nicely forward with the first 4 elements of the Scale being applied. Remember breaking each element down will allow you to bring them all together with experimentation and different patterns. The last pattern I posted of circle to straight line of 6 or more strides to another circle and so on is also a suitable pattern for working on impulsion. Sometimes as a horse moves with more Impulsion on a straight away, they lose their balance, rhythm and suppleness. Going back to the circle and staying there will help get those elements (Rhythm, suppleness, contact) back at which point you can go back on the straight line and work on Impulsion. That's where the problem solving value comes in. You keep working on all the pieces until they all come together. Don't hesitate to ask questions or comments below!
FDT
http://fdhorsetraining.com/

6.02.2011

With Rhythm, Relaxation and Suppleness comes...

See several examples or different outlines at Liberty, Bitted, and Bitless


Contact, The Frame, or a good Outline. So following this line of thinking, Each area needs to be fairly consistent to have the other. So they are all connected to the whole end product or resulting picture.

It is a sometimes back and forth dance in the training scale because as you work with one thing, you can lose another. So here is where the problem solving value of the Training scale is.

If we have Gotten to "Contact" on the Scale, it implies that we have the first 3 elements fairly intact. Rhythm, Relaxation, Suppleness equals Contact in theory. As the Contact gains quality, We can start to add "Impulsion" which is the 5th element on the Training Scale.

The problem solving starts when we lose something when we start asking for more of something else. For Example: As I start to add Impulsion, I lose Suppleness and therefore Contact or Outline. I would go back to working on Suppleness to regain the Contact and then if I felt it appropriate, I would try to add Impulsion again.
Another example of problem solving with the Training Scale would be. I have a good Rhythm, and when I go to Supple further, I lose the Rhythm or the Tempo changes. So I have to go back to settling the Rhythm to where I want it before I go back to Suppling again and trying to work toward Contact.

All of this can take Minutes, days, weeks, or months to achieve consistency so don't just think this will all come together in one ride. You just stick to a program and you'll know when it is appropriate to add the level of difficulty. My rule is, we have to be fairly consistent at each element before going to the next and be prepared to back up the whichever is necessary to maintain the foundation components. Basically that is what the Training Scale is. The foundation of all training and if there are cracks in the foundation, they'll be problems in your training.

What does good Contact look and feel like? Well it is a result of what the horses whole body is doing that produces a good, soft, outline. It is often thought to be fixed at the mouth or poll but this is not really true. The poll plays a small role but it is something that the horse OFFERS when their body and back are relaxed, supple, and moving in a good rhythm. The correct head and neck position are a by product of a good work program. Also this can be achieved at Liberty, Online and under saddle. As always, I like to start a concept at Liberty, Carry it through online, and then under saddle. The transition is so easy for the horse then, that is fun and simple. How training should always be!

Remember, all conformations, fitness levels, and disciplines seek different carriages (Outlines). At Liberty it is easiest to see what the horse is most naturally capable of and then build up from there over time. Some horses will be naturally heavier in the Contact , and some are naturally lighter as well as softer vs. stiffer. Work with what your horses' natural tendencies are and you will see improvement over time. More videos soon!
http://fdhorsetraining.com/

5.25.2011

Mounted Relaxation and Suppleness exercise examples

In riding and ground training, the best exercises allow for minimal interference from the rider and allow the horse to fully understand, participate offer his interpretation of what you have requested. You then can fine tune the pattern as the horse understands and raise the level of difficulty when it is appropriate. This would be when the horse is pretty consistent and relaxed in the exercise. You can then add the next element of difficulty which could be speed (change of gait), smaller circles, more impulsion etc.

Here are a couple of basic super simple Rhythm, relaxation and suppling patterns to try:

1. A simple Circle of 20 meters (aprox 65 ft): A circle ridden in a reasonably correct shape will naturally encourage the horse to settle into a relaxed, Balanced, and Rhythmic gait. For faster horses trying going 1-5 meters smaller. For less energetic horses, work with a large circle to encourage forwardness (energy). Change directions once you start to feel some consistency or if you have a greener horse who is taking a longer time.

2. When the above exercise is easy, you can add 6 strides straight ahead then circle, then 6 strides straight ahead, then circle and repeat until the whole pattern is as consistent as possible on the horses easy side first. Now go to the harder direction. Again here if you have a forward going horse you can reduce the circle 1-5 meters, And keep it nice and larger for the lower energy guys and even increase the number of straight ahead strides to 8-12. You can also keep switching directions back and forth.

As always, I would like to hear feedback on what you discovered with these exercises, any problems or successes in the comments section.


5.03.2011

Video: Example of working with the Training Scale at Liberty

This video shows how you can use Liberty work to "Ride" from the ground. Using a blend of body languages that are natural to the horse, you can prompt natural responses to Find Rhythm, Become more Supple, offer a Natural outline, and offer Natural Collection. We even touch on High School concepts. This is just the early stages. Mercury is young and offers a lot so we "play" with it in a fun way that is interesting to both of us.

Last post was talking about Relaxation and Suppleness in the Training Scale. In this video you see me working Long and low in walk and trot to stretch the Topline. As we get more into the circles for Rhythm and Suppleness, you will see me start to request more Lateral movements of Shoulder Fore and Shoulder In. I also use different sizes of circles to work with more Collection or more Engagement. I am in the beginning stages of working with Mercury on Liberty Half Steps and Piaffe/Passage. You can see the seeds being planted here as well. This work is by far the most fun and is a fantastic warm up of riding. Especially if you have a fresh horse it is far more connecting and bonding then mindless Lunging or Pen work. Anyone been trying this out with their horses? I want to hear about it!
http://fdhorsetraining.com/

4.21.2011

Training Scale Continued: Relaxation and Suppleness

Working on Suppling in hand...


Sorry I haven't posted in some time, but in case you didn't know I was in St. Vincents doing an amazing Clinic with Stina Herberg. It's on my other Blog if you want to see the highlights.

So I'm sticking to this thought on the Training scale series because I meant to finish it a long time ago so here is the second stage of the Training Scale which varies in interpretation by various schools. It is essentially the same concept though no matter the small differences.

Relaxation and Suppleness are the next step in the scale and some Scales or Pyramids do not include relaxation or it is a foregone assumption that the relaxation is there. I like to include it because it is essential to have relaxation in order to have true Suppleness and Throughness. A horse can be manually suppled by sawing, pulling and kicking but I doubt he will be relaxed! That is forced suppling and we can hardly even call it suppling at that. It is more like jamming the horse into a position.

I like to think about Suppling like a Yoga exercise for a horse. If you go to a Yoga class the instructor does not say to a beginner "ok put your feet behind your ears" on the first day of class. You start with very gentle and basic moves that gradually build strength and flexibility until one day you can do more advanced stretches or poses.

Suppling should be the same with a horse. We have to take into account the age, conformation, fitness level, training level, one sidedness and mind of the horse to gradually improve suppleness. I generally start my Training Scale exercises at Liberty because I want the horse to show me what is comfortable and natural to him without a rider, line, side reins, or head restriction. I can then see how to proceed with specific exercises at Liberty, on line, in hand, and or under saddle. I will choose exercises that will target weaknesses but work within what the horse offers at Liberty.

I can work with all stages of the Training scale (Rhythm, Relaxation, Suppleness, Contact, Straightness, Collection) at Liberty which is a gentle, fun and creative way to learn and work with it and your horse.

Getting back to the mind of the horse being relaxed as well as the body. Say you have a very high strung nervous horse, It would be a priority to relax this horse mentally if you were to have any hope of relaxing and suppling his body. Rhythm and balance exercises are a good place to work on Relaxation and open the door to the horse being able to accept suppling exercises.

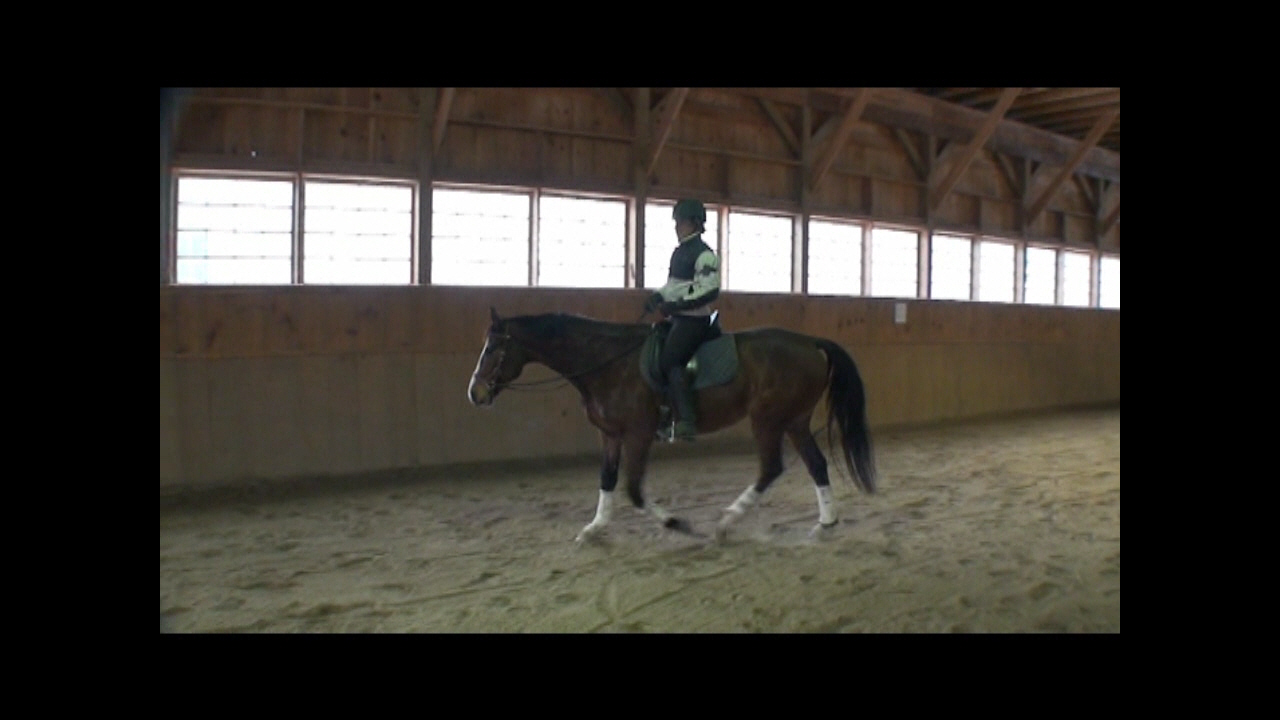
I will have some video in the coming weeks showing some examples of me working on the Training Scale and  at Liberty, On line, and under saddle. For this weeks exercise to try, I want you to turn your horse loose in the ring, round pen, or small paddock and work on Rhythm, Relaxation, and Natural Suppleness. Meaning what your horses' baseline is when moving unencumbered or manipulated. It doesn't matter if he goes in a circle or large in the arena. Notice if he prefers one direction or the other, Notice if his natural rhythm is slow, fast or perfect (if he is fresh, wait until he settles in his gaits to evaluate), Once you have established a relaxed, walk, and trot Rhythm, you can try a canter (again don't worry about freshness, just let them play and settle in when they're ready). Notice if your horse travels looking out the circle and how they end up when you are near the end of your session. Does their topline soften? Do they stretch long and low naturally better in one direction once they have relaxed? Do they stay inverted and braced the whole time? Make mental notes and remember them.

As always I'd like to hear your experiences in the comments area. I'll post some patterns and exercises in the coming weeks.

http://fdhorsetraining.com/

3.30.2011

Training scale exercise for Rhythm

Some of you may know about the Training Scale and some of you may not. The Training scale is a technical blue print for all training progression in all disciplines. With understanding and application in can be an amazingly helpful guide and problem solving tool. It is a guide because it moves in a logical progression and a problem solving guide because if you have a problem in a certain area, it is easy to look at the scale and say the problem is here.

The Training Scale goes something like this with some variations depending on the school. Rhythm (Balance), Relaxation, Suppleness, Contact (Frame, outline), Impulsion, Straightness, Collection. So generally and I say generally because I prefer not to have fixed ideas anywhere with horses, Just guidelines, Rhythm comes first. Rhythm means you and your horse have a consistent combination of Tempo and Rhythm. I like to figure out what my horses' natural walk, trot, and canter, tendency is and work from there. If my horses tempo is a little on the slow side but has a consistent Rhythm, I may just want to add a bit of energy to the gait to improve the quality. I will only do this if the horses topline is fairly relaxed otherwise you will wind up getting shorter, braced steps instead of longer, energetic, flowing stepsIf my horse has a naturally quick or fast tempo, I may use circles and bending figures to help bring the tempo down and more relaxed. Some horses have great natural rhythm and we just need to get out of their way and let them do their thing!

What I like to do with my horses to get them mentally engaged in training is to make request for them to carry out and then see that they understand and then set about seeing how long they will do it without me having to request again. The horse will quickly learn what their responsibility is in your partnership and you will have to ride less which they will appreciate.

So for example if I ride around an area (doesn't matter if is an arena, trail or field), I will see what walk rhythm my horse wants to take naturally. I will let them settle into this pace and relax a bit as I decide if it's too energetic, not energetic enough, or just right. Once I have decided what adjustments I want to make, I will start making requests for more energy in the too slow horse and use curved figures or various shapes for the fast horse until there is a consistent Rhythm and Tempo. Once I have that, I will start counting how many steps my horse maintained the Rhythm before I had to do something to get it back to where I wanted it. Don't judge if it's only a few strides at first. this is about starting somewhere and building up from there. Even if the next time you try it, it feels like you are starting from square one (believe me I have trained these types too so I understand!). Your goal is to get to a point where the horse will hold your requested Rhythm without much guidance from you for as many laps or the distance you request.

A good change to look for and reward in your horse is when you feel them start to realize what it is you are looking for and they give you that little bit more of their own offer. That is huge and should be rewarded immediately with a rest or a verbal praise and rub. So what that would look like to me would be, I was riding around at a certain gait and the horse may go a bit further then expected or increase from a quarter circle to a half etc. on his own. It is the moment I see the horses mind say "yes I understand the exercise...you want this and I will offer it to you" The next question your horse will have for you is....Was that enough? This is VERY important and is up to the individual to say yes or no I would like a bit more strides or energy etc. Or that is awesome I am so pleased with that effort! I work from a less is more place mostly so I would err on that side.
Below are a couple of videos that talk about and demonstrate Rhythm a bit further. As always any questions and comments on what you found while trying this out are great!

http://fdhorsetraining.com/


3.18.2011

Stride counting exercise

Here's a simple little exercise which can easily be incorporated into any pattern shape like a circle, serpentine, figure eight or on the rail. It is also applicable to any discipline, English or Western.

I want you to pick 4, 6, or 8 strides to work with and stick with that same number the whole time you do this in both directions. So if you pick 6, use only six. Also use the higher number if your horse is greener and work your way down to the lower ones as you master the exercise at each number. So when you have it good at 8, go down to 6 and so on.

The first stage is to work on walk to halt at the stride number you have selected. So from halt you would count 1-2-3-4-5-6-7-8 halt again and repeat on whatever pattern you have chosen to ride. I'm not going to tell you what this will do because I want you to discover it and report back in the comments what you found. All I will say is to do it until it is relaxed and as effortless as possible. Make mental notes of how it feels in the beginning attempts, and then notice changes until it's easy and relaxed. Make sure and stay in the halt on a slack but not loose rein for at least 5 seconds and that the horse will maintain the halt on the slack rein. If he doesn't, remind him of your request patiently until he does.

The number up repetitions is not as important as the moment you get relaxation and the feeling of little or no effort. When you get that, Let the horse stand and relax on a loose rein or free walk on a loose rein for at least 30 seconds before resuming and or changing directions. This can be progressed to trot to walk when it is good in walk to halt. This exercise can also be introduced at liberty and online first and I encourage this whenever introducing a new exercise or pattern before doing it mounted.

Pay attention to little changes good or bad leading up to it being good. If your horse is stopping crooked or sideways from where you planned to halt, Guide them calmly back to the spot you meant to stop. Let me know what you discovered in the comments!

http://fdhorsetraining.com/

2.23.2011

Waterhole Rituals, fear issues and Bitless Sidepull Dressage riding


Here is a video of another one of my students kind enough to share their lesson work with their horse working on building trust around spooking with Carolyn Resnick's Waterhole Rituals. Then moving into Liberty Warm up for Dressage and Mounted work in a my Buckaroo Leather Bitless Side Pull.
Purchase a Side Pull at http://fdhorsetraining.com/Bridleshop...


http://fdhorsetraining.com/

2.09.2011

My Uberstreichen playlist

I just thought I repost this set of videos of me practicing Carolyn Resnick's Uberstreichen exercises on a few very different horses. Some video shows my own variations, modifications and interpretations of these exercises. Exercises 1 through 3 are shown.
http://www.youtube.com/user/FDHorsetraining#grid/user/B77EEB460B164CFB

http://fdhorsetraining.com/