11.11.2011

FDTH Online Bitless video class update


I am really pleased with how this first class is going! Here is a sample of the Intro to Going Bitless online Virtual Clinic class on starting or transitioning to Bitless riding. I will be offering this class again as well as an Intermediate, and Advanced class. I will keep you posted on this. This video will be available for sale soon if you just want to work at your own leisure and pace. 
http://fdhorsetraining.com/
Subscribe to my Blog


10.26.2011

Announcing: Going Bitless class info

The Introduction to Going Bitless online class will start November 1st running through November 28th with the first videos to be released for personal practice followed by a Skype Q&A session a week. You will have the week to get signed up and review and practice the first exercises. The Skype Q&A answer session will be held at a time to be determined. Sunday or Monday AM or PM times are available by popular choice so let me know in the comments section what time of those two days may work best. If you have not downloaded Skype click here to get it. Otherwise, if you cannot make the calls or can't get Skype, You may post questions to the Blog or Email them through my Website. If you have a Youtube channel, you can send me links to your uploaded videos from your channel for evaluation. If you have another video host you use, that is fine too. I only need to be able to view them through the links to share with me for evaluation. If you need more help with this or have more questions contact me. The cost of the online clinic will be an Introductory rate of $150.00 payable through my site (click here to sign up and pay). To Purchase my Side Pull Bitless bridle click here.

Here is how the class will work:
1. Sign up by paying through Paypal. (click here to sign up and pay)
2. Add me through your Skype contacts search Farah.Dejohnette or Farah DeJohnette Horsemanship
3. Once you have signed up and I have your email, You will receive the links to the weeks video lessons.
4. Speak to me on the weekly Skype call to have questions answered and get feedback on videos.
5. Post questions on the blog or email them to me here if you don't or can't access Skype.

http://fdhorsetraining.com/
Subscribe to my Blog


9.30.2011

New! Upcoming class: Going Bitless

I'm too sexy in my Zebra Bitless Bridle!
After getting an inspired thought from a fellow horse lover, I am offering an online Bitless Bridle Class in the next few weeks. This class will introduce exercises and concepts for not just starting and transitioning to a Bitless Bridle but also improving your communication with any equipment. A good prerequisite would be Carolyn Resnick's Waterhole Rituals but it is not a necessity. It would also be beneficial if you have purchased one of my Buckaroo Bitless Side pulls. This is what I will be using in the classes for the feel I prefer. If you have one you and your horse already like, by all means keep using it. The lessons will apply to all types and configurations of Bitless bridles. I do most of my training, ground and mounted bitless, if not with my Liberty Rein used in conjunction.

Going Bitless is a personal choice and should be made because it feels right for you and your horse. I often train horses that go in bits in competition, Bitless until we have to compete. It is a nice way to keep the horses light and responsive in the bridle. I have found horses that will not accept a bit due to mouth issues or facial pain that a Bitless bridle is suitable for. Some horses just plain can't or wont accept a bit. Bitless is often the best option for these horses.

It is my personal belief that most if not all horses can go Bitless with time, patience and proper training as well as any discipline of horse. English or Western. I also believe that higher and advanced levels of riding can be done with a bitless bridle.

There are many Bitless options out there. I chose to work with Buckaroo Leather on a customized version on their existing Side Pull design after seeing the already nice line of Side Pulls they had. I had something in mind for many years and Buckaroo was able to help that design come to fruition (who else could make me Leopard and Zebra Bridles :D!). I never could find a bitless bridle that gave me a feel and communication that my horses and I both liked until now. Buckaroo offers many fun styles with bling and silver too so there is a style for everyone! Not many other Bitless bridles come in as many style options.

As for particulars of the class, I would like to offer this on Skype with video instruction if this is agreeable to most people. Skype is free and has a video option which you don't have to use if you don't want to but is nice for more live face to face interaction. If you don't have Skype it is simple and free to get and use for anyone anywhere in the world. Get Skype here I will update with more details on this upcoming class after I get back from the UK Clinics! Look for more announcements and details after October 17th. In the mean time here is my Bitless Bridle video Playlist to tide you over! : )
http://www.youtube.com/user/FDHorsetraining#grid/user/0A3C2341E9EBA6FB

Here is a link to a past post I wrote on Bitless riding for those interested.
http://fdhorsetraining.blogspot.com/2010/08/bitless-why-i-do-it.html

http://fdhorsetraining.com/
Subscribe to my Blog!

9.16.2011

Half circle pattern

Here is a nice pattern to work on balance, bend and transitions with your horse. Your circle can be from 15-20 meters (45-60ish ft). At each half (use the same spot each time to do the transitions, cones or dressage letters are helpful) you are going to do a transition. A transition can be a halt to walk, walk to trot, trot to canter, to halt, to trot etc. or any combination there of. Your goal is to change in the same spots each time and keep your horses' body on and as close to the shape of the circle. You are also trying to keep your circle as consistent is shape and size as possible. This is good for Energetic and low energy horses alike. If your horse goes way off the circle, leg yield him back to it or if he can't do that yet, guide him back to the circle until he understands the pattern. A nice progression to start with is energetic walk-halt-walk until it's easy. Then trot to walk to trot until easy and so on. If you have a very energetic horse you can use quarter circle transitions. Move on to canter when you feel the others a easy. More advanced riders can do lengthen stride to collected stride or trot or canters to halt. Have fun and let me know how it goes!
http://fdhorsetraining.com/
Subscribe to my blog!

9.01.2011

Pole stride length exercise

This weeks exercise is for learning how to feel your horses' stride length at the walk, trot and eventually canter.

You can do this at Liberty, in hand, and mounted. First you will set up two poles on a straight line 20, 30, or 40 feet apart. Establish a good walk rhythm and then walk over both the poles three times and count how many strides are BETWEEN the two poles. Start counting the number of steps ONLY after you are completely over the first pole and STOP counting BEFORE you go over the second pole. This is important and takes practice.

You want to count 3 times because you want to get an average number of strides for your working gait. Once you have established that number you can set about lengthening your horses stride around the arena by asking with your legs and allowing the energy you create to come through your hips. Get what you think is a longer stride before you go through the poles and then go through them and count the same way as you did before. What you will find is, the number of stride will go down as the stride lengthens. For example if your working walk gave you ten strides in between the poles on average, when you successfully lengthen the stride, It would go down to 9 or possibly 8. The same would go for collecting or shortening the strides between the poles but the opposite. The number will go up ie. 11-12 strides because you can fit more in between the poles.

The role of the poles is to give you instant feedback about the whether the stride actually changed or not. If you keep getting the same number of strides make a bigger change as you go around your ring and experiment. Don't worry if your horse breaks gait. You may be at their maximum ability for now. Try to get the longer stride 3 times in a row, but if it is too difficult, work up to it. It will get better with practice. At Liberty, you can practice this in Companion movement. On line, you can walk or trot with your horse next to you. Once you have it at the walk, try it at the trot and when it is easy try it at the canter. Try to get it smooth and rhythmic as possible by the end. Don't worry if it's a bit inconsistent at first. Practice and repetitions will help you and your horse get comfortable with the exercise. Let me know how it goes in the comment section!

8.18.2011

How to introduce Lateral movement and why


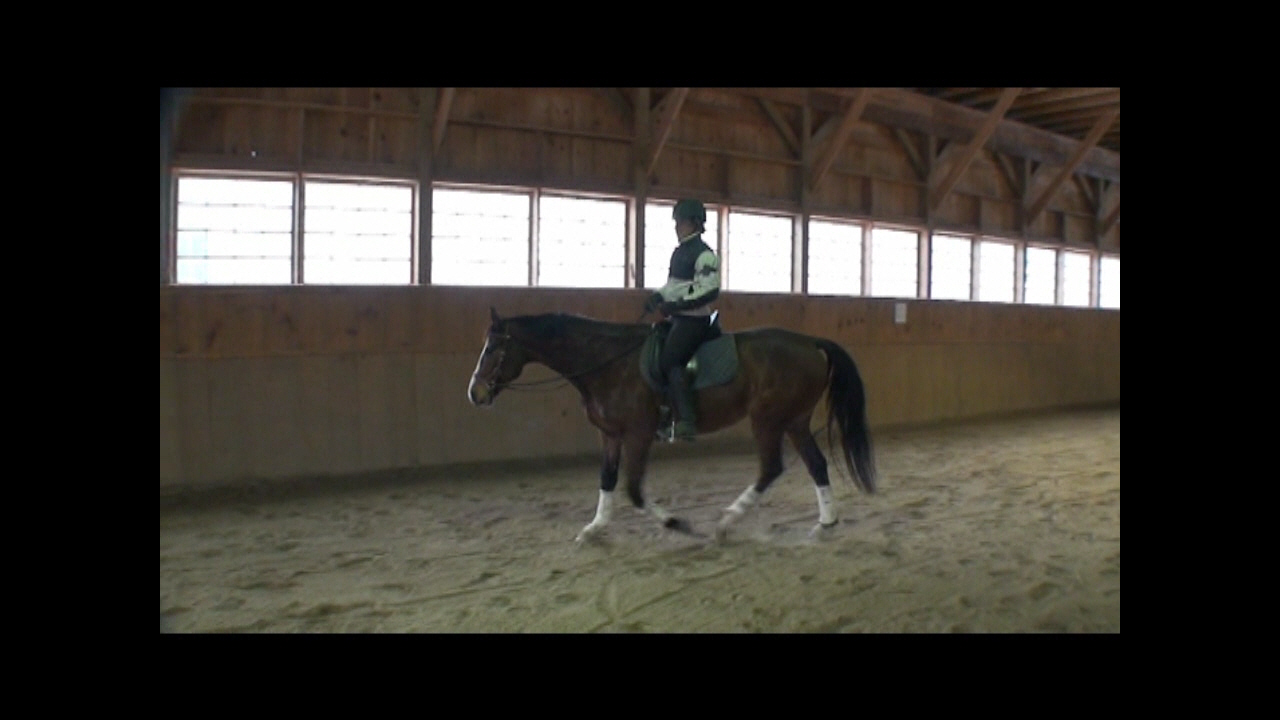
Some of you may be saying "Lateral what?" and some of you will recognize this Horsemanship vocabulary word. Lateral Movement is simply sideways or sideways and forward movement combined ie. Leg yielding, Turn on the Forehand, Side or Full pass, Turn on the Haunches, Shoulder in and Half pass are all examples of Lateral movement.

Lateral exercises embody and resemble Yoga for horses done correctly and with attention to what is appropriate to the horses level, fitness and ability.
Performed correctly, Lateral movements improve symetrical hind end strength, balance, flexibility, and bending. They are a cornerstone of many more advanced maneuvers.

I introduce it at Liberty first in Eye Contact exercises where there is no actual contact with the horse. The horse, by merely keeping his eye on me will perform a simple Turn on the Forehand. I refine it from there up.  That's the first exercise you can play with if you have good Eye Contact from you horse. This can also be turned into Liberty Roll Backs for you western riders or if you just want to have fun and try different things with your horse. Remember a Roll Back is also a Turn on the Haunches sped up a bit. Reining maneuvers are rooted quite firmly in Dressage fundamentals and are merely performed at higher speeds. There really isn't a Discipline that doesn't utilize Dressage Principles in some way shape or form.

If you want to Introduce Lateral work in hand (Bridle or halter). Follow these steps. As a rule I teach everything on the ground first, Liberty first if possible then In Hand. To introduce the concept (and it is a hard concept for a horse) we are going to differentiate the difference between what one leg and two legs means. On the ground this can be applied in a non touch or direct touch method. I am going to deal with how I introduce the Leg cue and the movement to the horse.

I will stand on the side of my horse with either my hand on the bridge of the nose or on my line or reins. I will touch my horses side with my hand where my leg would go with the feel I would like him to respond to. I will then Cluck. One of a few things will happen. The horse may go forward which you will halt and then ask again. The horse may go backwards which you will wait through until you horse offers even the slightest sideways step and then release. You will always release on a tiny effort to the right idea. The horse may not move at all which is actually and impulsion problem. Ask them to step forward one step and then ask again releasing as soon as they "think" the right thought. One other response is that the horse pushes toward you. Just quietly resist until the horse offers to move the other way and praise them and release. Be generous with verbal praise and scratches. You can build up to bigger movements and more steps from there. Be the boss you'd want to show up to work for. Let me know how it goes in the comments section or if you have any questions.
http://fdhorsetraining.com/
Subscribe to my Blog!


8.06.2011

Position Exercises: Mirroring in the saddle Part 2

The Second part of this Position Mirroring exercise is to ride straight lines. You can go down a long side of your arena, the quarter lines, or the center lines. You can also do this in a reasonably flat field. The Quarter and center lines are good because they are open on both sides and it's easier to feel if you and your horse drift a bit as well as  become aware of yours and your horses' Shoulder and Hips. First just ride straight and notice things. The drifts left and right. Is it more one way then the other? Don't try to fix just gather information. Ride the lines about 3 times. The next three times I want you to become aware of your hips and shoulders and them staying absolutely parallel the whole way down the line. What did you discover? What did your horse tell you? Keep playing with it and you can progress to trot and canter as you feel comfortable at each gait. If you have tried this exercise, I'd love to hear from you!
http://fdhorsetraining.com/
Subscribe to my Blog